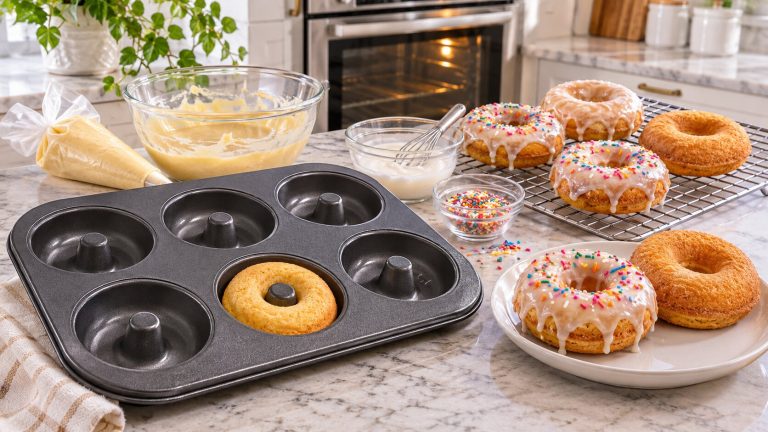
A doughnut pan is a baking tray with ring-shaped cavities, each one built around a raised center post. You spoon batter into the ring, the post keeps the hole open while the batter sets, and what comes out is a cake-style doughnut baked rather than fried.
That’s the whole idea. No pot of hot oil, no thermometer, no splatter on the stove. Just a pan, an oven, and about ten minutes.
People usually find these pans after deciding they want doughnuts at home but don’t want to deal with a quart of frying oil. That trade-off follows you into every batch, so it helps to know what you’re actually getting before the pan takes up cabinet space.
Doughnut Pan Basics: Baked, Not Fried
A doughnut pan makes cake doughnuts. The texture lands closer to a tender muffin than to the airy, chewy pull of a yeast-raised doughnut from a bakery case. If that’s what you’re picturing, the pan alone won’t get you there.
Yeast dough needs time to rise and behaves differently in a mold, so traditional raised doughnuts require recipe changes before they work in an oven. Cake batter, on the other hand, is a natural fit. It pours, it holds its shape against the center post, and it bakes evenly.
These pans are oven-only, full stop. The nonstick coating isn’t built for direct stovetop heat, and the metal won’t distribute it evenly anyway. Stovetop doughnuts mean frying, a different technique with different equipment.
Steel, Carbon Steel, or Silicone
Most doughnut pans are made from stainless steel, carbon steel, or silicone, and the differences show up over years rather than weeks.
Heavy stainless resists warping better than the alternatives. If you bake doughnuts weekly, that rigidity matters, because a pan that bows slightly in the middle gives you uneven rings. Many stainless pans are rated oven safe to around 450°F, well above anything a doughnut recipe asks for.
Carbon steel sits in the middle. It’s lighter, it heats up faster, and for most home kitchens it holds up fine.
Silicone molds exist, and they’re cheap and store flat. But they flex. Without a rigid frame underneath, a full mold sags when you move it from counter to oven, and the doughnuts come out lopsided. Some bakers work around this by setting the mold on a sheet pan.
Why the Coating Matters More Than the Metal
The coating does more work than the metal underneath it. PFAS-free nonstick has become common on newer pans, and it performs a little differently from older formulations, which mostly just means adjusting how much grease you use.
A good coating will release most cake doughnuts without any help. Even so, plenty of bakers brush the cavities with butter or oil anyway, because it improves browning and gives the outside a slight crisp. Try your first batch without grease and see what happens; if anything sticks, add a light coat next time.
Avoid regular cooking spray on nonstick surfaces, since it tends to build up a sticky residue that’s hard to remove. Butter, shortening, or a baking spray that includes flour are safer choices.
Hand-washing extends coating life considerably. Many pans are labeled dishwasher safe, but detergent and high heat wear the surface faster than warm soapy water and a soft cloth. If batter bakes onto the pan, let it soak for a few minutes rather than scrubbing with anything abrasive. Metal utensils and scouring pads will cut the coating.
How Many Doughnuts You Get Per Bake
Standard pans have six cavities. That’s a practical number for one pan, but it also means a single pan gives you half a dozen doughnuts per bake, which goes fast with a family.
Cavity diameter and depth determine the finished doughnut. Many mainstream pans run around 3.25 inches per cavity, producing something close to a bakery cake doughnut, and a typical pan measures roughly 12.5 by 8.5 inches. Mini pans with twelve small cavities make bite-sized doughnuts that are good for decorating with kids, and jumbo versions exist too, though both are specialty purchases rather than first pans.
Two-pan sets are common, giving you twelve doughnuts in one oven session. Details like extended handles for pulling a hot pan out, a center post deep enough to keep the hole from closing, and whether the maker recommends hand-washing vary enough between models that comparing a few side by side in the full guide beats guessing from a single product photo.
From Batter to Rack
The process is short, start to finish. Here’s the sequence most recipes follow:
- Lightly grease each cavity with butter, shortening, or a flour-based baking spray.
- Fill cavities two-thirds to three-quarters full; the batter rises and overfilling closes the hole.
- Bake at 350 to 375°F for 8 to 12 minutes.
- Check at the 8-minute mark: tops should be lightly golden, and a toothpick in the thickest part comes out clean or with a few crumbs.
- Let the pan cool briefly, then turn the doughnuts out before glazing.
Home ovens run hot or cold more often than people assume, so your first batch is a calibration run. Note what happened and adjust the time for the next one.
Boxed cake mix works, incidentally. Some bakers thin it slightly with applesauce or adjust the liquid to get a batter that pours cleanly into the rings.
Keeping a Doughnut Pan for the Long Haul
These are specialty pans, and they take up cabinet space you could be using for something you reach for daily. Thin pans stack neatly on a standard shelf. Heavier ones need more support but resist warping over time.
Store them flat rather than hanging. Hanging puts pressure on the rim and lets pans knock against each other, which is how coatings get chipped.
Treated this way, a heavy steel pan lasts decades. The base metal almost never fails first; the nonstick does, and that comes down to how you wash and store it.
A pan you wash by hand and store flat will outlast the muffin tin it replaced by years, which is really the only argument for buying one instead of grabbing a foil ring set for an occasional batch. If doughnuts happen twice a year, skip it. If they’re closer to a weekend habit, the extra drawer space buys you rings that come out round every single time.